Posts Tagged 'Craft'

Sail Away Pop Up Card

Sail Away popup card | littlegreenbox.wordpress.com

Hi all!
Just wanted to share with you a little something-something I made recently. This simple pop up card was given to my dear friends, Fabio and Noa, who got married on a beautiful seaside terrace last week. They are super talented interior designers, and I wish them all the best both in their personal and professional (awesome) lives.

Sail Away popup card | littlegreenbox.wordpress.com

The venue they chose is located on one of my favourite beaches in Israel, where you can spot a boat with white sails on the horizon at any time.

Sail Away popup card | littlegreenbox.wordpress.com

Sail Away popup card | littlegreenbox.wordpress.com

Sail Away popup card | littlegreenbox.wordpress.com

Fabio and Noa – I’m so happy you found each other!

ShirA

Rosh HaShana Pop Up Workshop

I’m happy to announce a new workshop, and it’s at the end of this week! To my Israeli readers – hurry up and sign up for this fun class, in which we’ll create some great pop-up cards for Rosh HaShana!

Here are the detais:

Flier copy

RoshHaShana Pop Ups - the little green box - 1

RoshHaShana Pop Ups - the little green box - 2

RoshHaShana Pop Ups - the little green box - 3

RoshHaShana Pop Ups - the little green box - 4

RoshHaShana Pop Ups - the little green box - 5

RoshHaShana Pop Ups - the little green box - 6

RoshHaShana Pop Ups - the little green box - 7

RoshHaShana Pop Ups - the little green box - 8

And to my non-Hebrew speaking readers, thanks for bearing with me, some great posts are on their way!

Have a lovely week,
ShirA

Welcome Home Pop-Up Card

Hello there, craft buddies 🙂

I made this lovely “Welcome home” pop up card for Yuval, my husband’s colleague and friend. He had just finished building his house, and we came over to have a first peek at their new love nest.

Welcome Home_ pop up card_little green box-1

Welcome Home_ pop up card_little green box-2

Welcome Home_ pop up card_little green box-3

I love this card. It’s simple yet elegant, and you can decorate in different ways for different occasions – the surrounding of the house can reflect the season, it could be a candy house or maybe a gingerbread house for the holidays.

Welcome Home_ pop up card_little green box-4

Welcome Home_ pop up card_little green box-5

Welcome Home_ pop up card_little green box-6

Sooo… Who wants a tutorial? Ha ha… I knew you would! I’m working on a great and easy how-to for this card, coming real soon.

Have a wonderful day,
ShirA

Butterflies Workshop

LGB-workshop1

Hi everybody!

It’s been real quiet here lately, I know… As part of my coming-back-to-life, I’m happy to announce a new workshop! To my Israeli readers – hurry up and sign up for this fun spring-inspired class!

LGB-workshop2

And to my non-Hebrew speaking readers, thanks for bearing with me, some great posts are on their way!

Have a lovely week,
ShirA

A Rainy Day

It’s not an easy task living in Israel these days, the past two weeks were full of violence. Our first baby is due only days from now and this is not the reality I wished him to be born to. That’s why I was grateful when the fighting stopped and it started raining. Clear, wonderful rain, that cleaned up the dust and smelled like winter.

I hope you are all safe and dry, wherever you are.
Have a peaceful week,

ShirA

A Girl With A Kite Pop-Up Card

Hi!

This sweet little card was given to my good friend Meital for her birthday awhile ago. I wanted to create something simple and straight forward, yet full of delicate details. It’s all cut by hand, because though the Silhouette is an AWESOME machine – I find hand-cut pieces being more personal and heart warming.

Have a great weekend you all!
ShirA

Elevated Envelope Project

First of all – a proud announcement – this is the 100th post here at the Little Green Box! I’m far for being the most dedicated blogger (though I should be), yet, I’m quite happy and proud of getting this far and wanting more! Thank you all so much for the support in your comments and e-mails, I’ve learned a lot about the blogging world and about myself – all thanks to you.

This week I want to present a most amazing project I took part in – The Elevated Envelope. You can read all about it here, at the Ephemera blog, by Tara Bliven.
Basically, it means you receive a list of creative people from around the world, and you mail them. REAL mail, with stamps and all ;). The main focus is actually the envelope itself, not the contents. You can make anything at all, and basically “bring it”, getting your creative juices going. You’ll be receiving envelopes from the rest of the people in your group, that way you all get to exchange artsy gifts, on a small scale.
In my list I had some new pen-pals from the US, Canada, Greece, Japan, Germany and the UK. I can’t tell you how exciting it is to open the mailbox and find a hand-painted envelope inside, addressed to you!

After much thought I decided to illustrate my envelopes. I haven’t been drawing for a long time now, it seemed like a wonderful excuse :).
The topic we all got as an inspiration for the summer exchange was the word “Sweet”. The first thing that came to my mind was “summer popsicles”. Israel is SOOOO sticky and steamy this time of year, so what’s more appropriate than a cool popsicle?
This was a chance for me to give my pen-pals a tiny peek of Israel, so for each envelope I chose a different location around the city of Tel Aviv, and illustrated a scene showing someone eating a dripping popsicle. Inside the envelopes I placed small notes on which I wrote a few words about that specific location and added a little gift from me – a popsicle-themed paper bookmark.

Here’s a look at the illustrations, before I folded them into envelopes:


And here they all are, addressed and ready to be sent:

These are the orange cards I made for writing the descriptions of the chosen locations, and the cute popsicle bookmarks.

Have a great week!

ShirA

Moving Arm Pop-up Tutorial

Time for another tutorial!
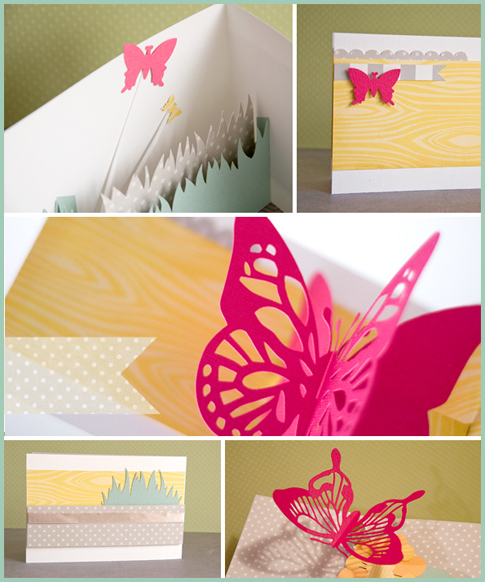
This great mechanism is super-easy and actually really basic, but it can be the base for many beautiful 3D cards! I chose butterflies as an example to demonstrate the mechanism, but it could have been anything else: balloons, flowers, little signs with words on them… Be bold and creative, and share your results with me! 🙂

1. Start by choosing the paper you’re going to use. I went for green dotted cardstock for the base of the card. Make sure the base of the card is made out of sturdy, heavy-weight cardstock (and not thin paper).

2. Cut the paper for the card’s base measuring 20×15 cm, score in the middle and fold (you’ll obtain a 10×15 cm closed card).

3. Now would be a good time to make all the bits and pieces that will decorate your card. As the main moving elements I stamped butterflies on an off-white card stock, and cut them out carefully. I also cut some leaves in different shades of green for the background.

4. Next step – the mechanism itself. First download the template:

Moving arm mechanism PDF template

Print it out on a A4 sheet of paper and cut the template out, leaving margins around it as shown on the sketch and picture.
Use some masking-tape to attach the template to a piece of patterned paper (I recommend using the same paper as the card’s base. That way the mechanism will blend better and be less visible). Using a stylus or bone-folder, score all the dashed lines of the template. That will allow all the folds to be sharp and accurate. Cut along the continuous lines and remove the template.

5. Fold and unfold all the scored lines to ensure flexible axes. Fold the mechanism in two. Add glue to one of the glue tabs and place the mechanism somewhere along the central fold of the card’s base. Make sure the mechanism’s crease is facing you and is perpendicular to the card base’s crease.

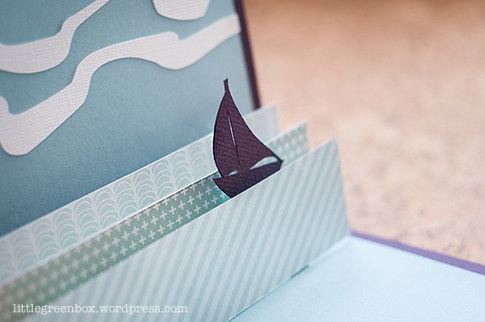
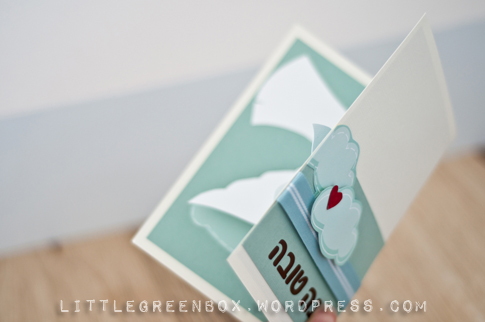
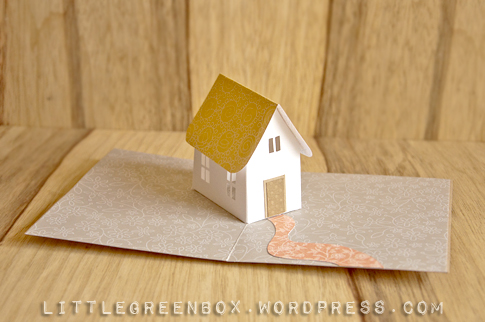
6. Add glue to the other glue tab and shut the card close. Wait for the glue to dry, do not be tempted to open it right away! This is how it’ll look once you open the card.

7. The base of the mechanism is done! To create the arms that carry your main decorative element I suggest using double-thickness paper. Simply glue two pieces of card stock (again, I used the same paper as the card’s base) back to back.

8. Once the glue of your double-sided paper dries, you can cut the arms out of it. You can make them straight or curved – as you wish!

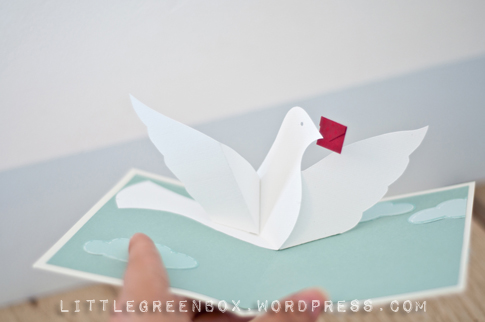
9. Glue an arm to the back of a decorative element (for me, it was a butterfly). Glue the other side of the arm to the mechanism, open and close your card just to make sure nothing peeks out when the card is closed. You can finish the card here, or add more mechanisms and more elements. Notice how attaching the arms to the mechanism’s base in different angles creates a more interesting result.

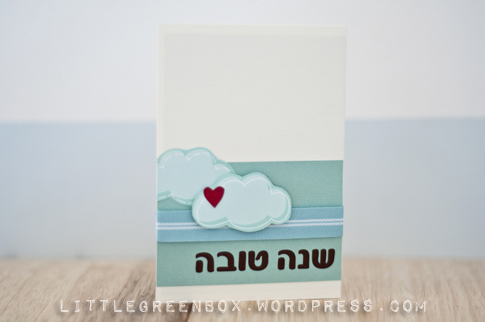
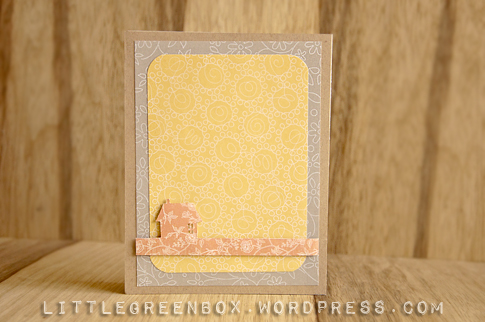
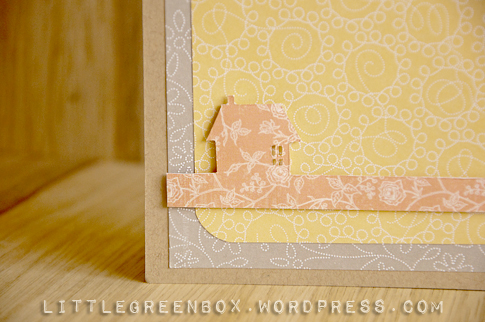
10. Time to decorate the outside of your card. You’re all done!


Have fun 😉
ShirA

Thailand All Around Pop-Up Card

A few months ago, we celebrated Ruth’s 30th birthday. Ruth has been my good friend for over 25 (!) years, and she is as close as a sister to me. For this special birthday Ruth’s wish was to travel to Thailand once again, to enjoy a good watermelon shake on an island’s beach and to shop like crazy in Bangkok. It seemed like this year she and her husband wouldn’t be able to travel anywhere, yet she kept reminding us about her little birthday fantasy.
To make sure Ruth (almost) gets what she wanted, my girlfriends and I decided to give her the full “Thai experience” – we got her a thai foot massage, followed by an authentic home-made thai meal. We sat down to eat our lovely lunch wearing sarongs and fisherman-pants… Just to make sure the atmosphere is right!

The card I made for the occasion is actually a little booklet, it can be viewed page by page, or opened entirely for display. Though I do have the Silhouette Cameo, and people now assume I cut everything with it, this piece is all illustrated and cut by hand! 🙂

The first page presents the beautiful natural scenery of Thailand, the mountains, the jungle and the elephants.

The second page reflects a scene from Bangkok, the amazing contrast of the majestic temples and the noisy, crouded streets and markets.

The third page is a little taste of the beaches – sand, sun and cocktails 🙂

The fourth page has a spiritual angle to it – for her to be reminded of the impressive Buddha sculptures, the calm monastery gardens and the peaceful expression of the monks.

If you never had the chance to visit Thailand, I warmly recommend it! It’s an exciting and intriguing place.

Ruth my love – you know if it was up to me I would have taken you on a travel to the moon and beyond if I could!

ShirA

I Love Notebooks

I love notebooks. I have so many notebooks and notepads and sketchbooks all around the house… I find them irresistible! Sometimes it’s the smoothness of the paper, sometimes it’s the beautiful cover. I can’t explain it, it’s a serious soft-spot of mine.

Not long ago, me and a bunch of crafty women came together to celebrate one of the group member’s birthday. This group of girls, all from different backgrounds and geographic locations, is a great new social circle that evolved in the past year. Birthdays are celebrated within this group in a most fun way; Among other birthday activities, we each gave the birthday girl, Michal, a gift and a card which she had to guess who it was from. Mine was kinda easy – everything that pops up is usually made by me…

I made her several notebooks – one large with a hard cover (which I binded with my bind-it-all) and a small pocket size notepad. I added a gigantic wooden pencil and wrapped it up with craft paper that I pre-stamped.
The card was actually a part of a card-book: all the guests made their card the same size, with a design on the front and a few words on the back. Once Michal guessed who made what (based on the front side), she could read her greetings on the back. Then, all the cards were binded together into a book.


It was a great party! The food was delicious and the company was awesome! I made the pink girly cupcakes for desert 🙂


Have a great week!
ShirA


My Name is ShirA. This is my personal blog, where I share my love for paper craft, hand made creations and all things beautiful.

You can contact me at:
shira.littlegreenbox@gmail.com

PLEASE do not publish photos, tutorials and text from this blog without my permission.

Categories

Enter your email address to subscribe to this blog and receive notifications of new posts by email.